Epoxy flooring has become the go-to solution for homeowners looking to enhance the durability and aesthetics of their garage floors. This comprehensive guide will take you through the step-by-step process of how to epoxy a garage floor, providing valuable insights and expert tips for a successful epoxy flooring installation.
Understanding Epoxy
Before diving into the application process, it’s crucial to understand what epoxy is and why it’s an excellent choice for garage floors. Epoxy is a resilient material that, when applied as a coating, forms a protective layer on the concrete surface. This not only adds strength but also provides resistance against chemicals, stains, and wear.
There are different types of epoxy available for garage floors, each with its unique properties. Understanding these variations will help you choose the right epoxy for your specific needs. Additionally, delving into how epoxy works as a protective coating will give you a deeper appreciation for the benefits it offers.
Preparing the Garage Floor
A successful epoxy flooring installation starts with proper preparation. Begin by thoroughly cleaning the garage floor, removing any oil stains, dirt, and debris. Patch up cracks and holes using an appropriate filler to ensure a smooth and even surface. Surface etching is a crucial step to promote better adhesion of the epoxy coating.
Ensuring the floor is completely dry before applying epoxy is essential for a long-lasting finish. Moisture can interfere with the bonding process, leading to adhesion issues and a compromised result. Take the time to prepare the surface adequately to set the foundation for a flawless epoxy application.
Gathering Materials and Tools
To embark on your epoxy flooring journey, you’ll need the right materials and tools. Epoxy coating kits typically include epoxy resin, hardener, and sometimes, a primer. Familiarize yourself with each component, and ensure you have the necessary tools, such as a roller, brush, and mixing equipment.
Safety is paramount during the epoxy flooring installation process. Don’t forget to wear protective gear, including gloves and goggles, and work in a well-ventilated area. Taking the time to gather all the required materials and tools beforehand will make the application process smoother and more efficient.
Step-by-Step Application Guide
Now that you’ve prepped your garage floor and gathered the necessary materials, it’s time to dive into the step-by-step application guide.
Priming the Floor
The first step involves priming the floor. The primer is a crucial component that ensures proper adhesion of the epoxy coating. Follow the manufacturer’s instructions for the specific primer you’re using, and apply it evenly across the entire floor.
Mixing Epoxy Components
Accurate mixing of the epoxy components is vital for a successful application. Thoroughly mix the epoxy resin and hardener according to the recommended ratios. This ensures that the epoxy cures properly, providing the desired strength and durability.
Applying the Epoxy Coating
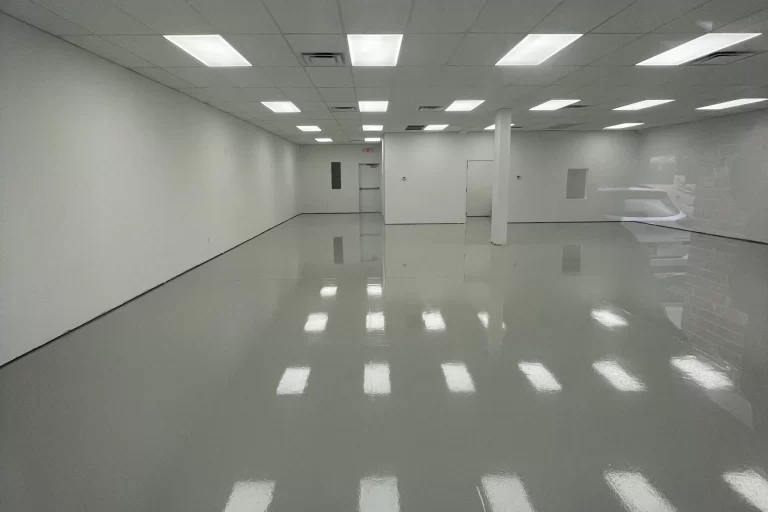
With the primer and epoxy mixture ready, it’s time to apply the coating. Use a roller or brush to achieve an even coat, paying attention to corners and edges. Applying the epoxy in thin, uniform layers is key to achieving a professional finish. If you’re feeling adventurous, consider adding decorative elements or flakes to enhance the visual appeal of your garage floor.
Curing and Drying
Understanding the curing process is crucial for the success of your epoxy flooring installation. Allow the epoxy to cure under the right conditions, typically at a specific temperature and humidity level. Rushing this step can compromise the integrity of the coating, so exercise patience before subjecting the floor to normal use.
Maintenance Tips
Congratulations, your garage floor now boasts a shiny, durable epoxy coating. To ensure it stands the test of time, implement proper maintenance practices. Regularly clean the epoxy floor using mild detergents and soft brushes. This not only preserves its appearance but also prevents damage from debris and chemicals.
To extend the lifespan of your epoxy flooring, be mindful of heavy equipment and sharp objects that could potentially scratch or dent the surface. In case of any damage, promptly touch up the affected areas or consider reapplying the epoxy to maintain the floor’s integrity.
Troubleshooting Common Issues
Even with careful planning, issues may arise during or after the epoxy flooring installation. Bubbles or imperfections in the coating, adhesion problems, and peeling are common concerns. This section of the guide addresses these issues and provides valuable insights on prevention and solutions, ensuring your garage floor remains pristine.
Conclusion
In conclusion, this expert’s guide has equipped you with the knowledge and skills needed to successfully epoxy your garage floor. By following the outlined steps and incorporating the provided tips, you’ll transform your garage into a durable, visually appealing space. Embrace the art of epoxy flooring installation, and enjoy the long-lasting benefits of a professionally coated garage floor.